 Tanin Rojanapiansatith
e-mail
Tanin Rojanapiansatith
e-mail
Software Engineer at Capital One UK
Tanin Rojanapiansatith
e-mail
Software Engineer at Capital One UK
 Photo by Atanas Dzhingarov on Unsplash
What do you do?
May be, ask the API developers to provide you with some dummy endpoints? Then you’re too polite to poke the API developers to provide you with all the different versions of JSON data to test your app; some with missing fields, some with empty fields, or some with unknown fields.
Of course, this post is about to say, you can create your own web server with Swift <exclamation mark>.
There are quite a few options of Swift frameworks for developing a server-side Swift. This post will focus on Vapor, an open-source web framework written in Swift.
The goal here is to create a simple JSON server application. Without further ado, let’s get started.
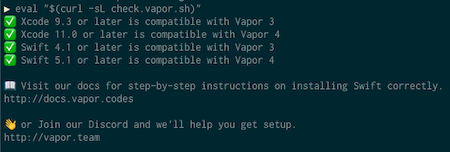
Vapor provides a handy script for you to run and see whether your system is ready. It will basically verify whether you have compatible version Swift installed.
eval "$(curl -sL check.vapor.sh)"
Once your system is ready, you can install Vapor through brew
brew tap vapor/tap
brew install vapor/tap/vapor
You can find out more info about installing Vapor on Mac from https://docs.vapor.codes/3.0/install/macos/
Create a new directory for your server app and cd into it.
mkdir myVaporApp
cd myVaporApp
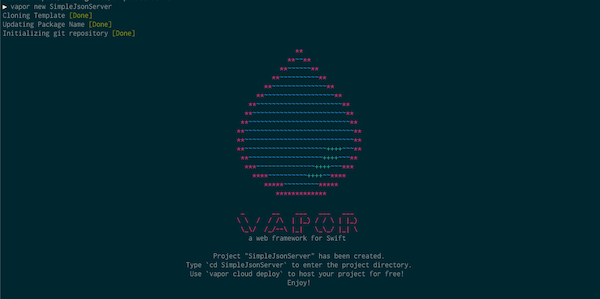
Then create a new Vapor app with
vapor new SimpleJsonServer
cd into your newly created Vapor app. Then build and run.
cd SimpleJsonServer
vapor build
vapor run
The building and running steps may take a while.
Then you may want to verify the server by going to http://localhost:8080 on your machine’s browser.
You can also use other types of editors to edit your Vapor app. But Vapor is fully compatible with our dear Xcode. You can use the run button to run the server application, use Xcode debugger, print out logs, and so forth.
Create an Xcode project file for our Vapor app
vapor xcode -y
Xcode will start up with your Vapor project.
There is a lot to learn about the project structure of a Vapor app. But let’s focus on returning JSON data.
Head stright to Sources -> App -> routes.swift. In here, you’ll see something like
router.get("hello") { req in
    return "Hello, world!"
}
This is what the server returns when we make a GET request to the endpoint /hello.
You can try it out by running the server from Xcode as you would run an app (Make sure the running scheme is an executable Run). Click on the play button on the top left or do Command + R. Then enter http://localhost:8080/hello in your browser’s address bar.
You’ll see “Hello, world!”
So, you may want to try to create a GET endpoint of your own.
Under the hello world route, you may want to try:
router.get("api", "data") { req in
   return "some data"
}
Rerun the project and go to http://localhost:8080/api/data. You’ll see the string you return from the new route you’ve just created.
Let’s say this is the JSON you want to return
{
    "name":"Bruce Wayne",
    "job":"Owner of Wayne Enterprises",
    "skills":[
	    "Genius-level intellect",
	    "Expert detective",
        "Master martial artist and hand-to-hand combatant",
	    "Master of disguise",
	    "Fluent in various languages"
    ]
}
On the client or app side, you might create a model like this for the above JSON.
final class Person: Codable {
    let name: String
    let job: String
    let skills: [String]

    init(name: String, job: String, skills: [String]) {
        self.name = name
        self.job = job
        self.skills = skills
    }
}
Well, fortunately, as both the client and the server-sides are written in Swift, the above model can also be used on the server side!
Copy the above model into your Vapor project. Then, update your GET route to return an instance of Person.
 router.get("api", "data") { req -> Person in
        return Person(
            name: "Bruce Wayne",
            job: "Owner of Wayne Enterprises",
            skills: [
                "Genius-level intellect",
                "Expert detective",
                "Master martial artist and hand-to-hand combatant",
                "Master of disguise",
                "Fluent in various languages"
            ]
        )
    }
Before you build, extend your Person model to conform to Content. It is Vapor’s wrapper around Codable which allows you to convert models into various formats.
extension Person: Content {}
Since our model already conforms to Codable, that’s all we need to do.
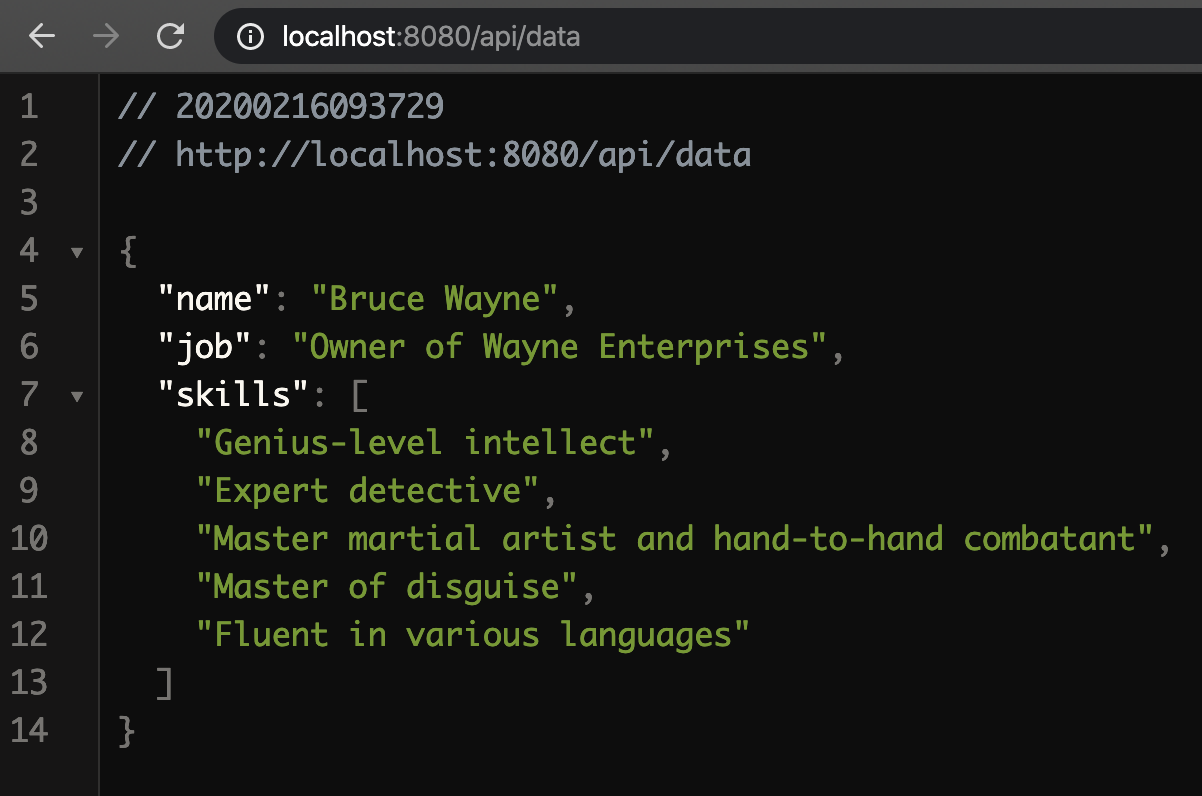
Build and rerun your Vapor app, go to http://localhost:8080/api/data. You should see the exact same JSON as the one we saw earlier in this section.
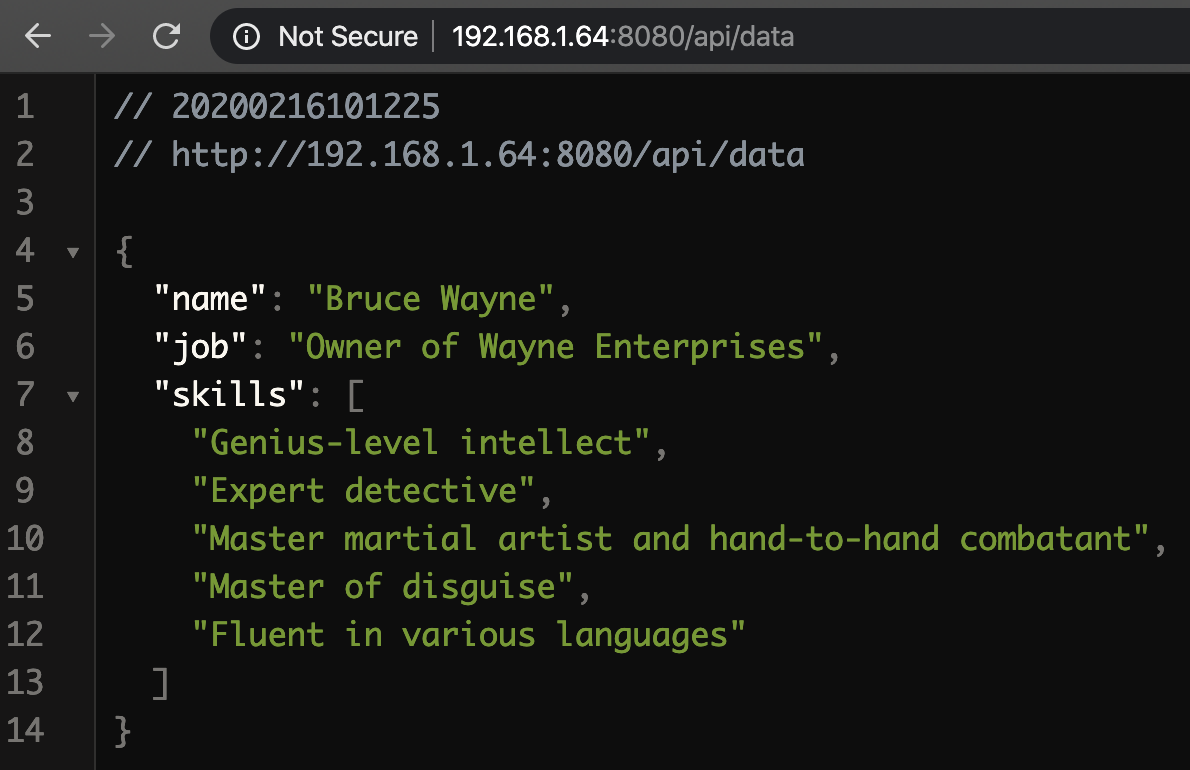
localhost on your Mac will only be visible to simulators. Which is fine. But we need to get as close to the real situation as we can so we need to do it on real phones.
First, you need to find out about the local IP address of your Mac. Just go to System Preferences -> Network.
Then, change the hostname of your server to that IP address. For example, my Mac local IP address is 192.168.1.64.
I changed the hostname by adding the following lines to Sources/App/configure.swift (anywhere in the configure function)
let serverConfiure = NIOServerConfig.default(hostname: "192.168.1.64", port: 8080)
services.register(serverConfiure)
Build and run again. I verified it by going to http://192.168.1.64:8080/api/data on a browser.
Here’s a link to the project created in this post https://github.com/landtanin/SimpleJsonServer.
As a bonus, to demonstrate that the models are actually identical on the server and the client sides, I also created an app which consumes the JSON from the API in this article and displays it on a screen. Here is how it looks like (In case you wonder, this screen is written in SwiftUI).
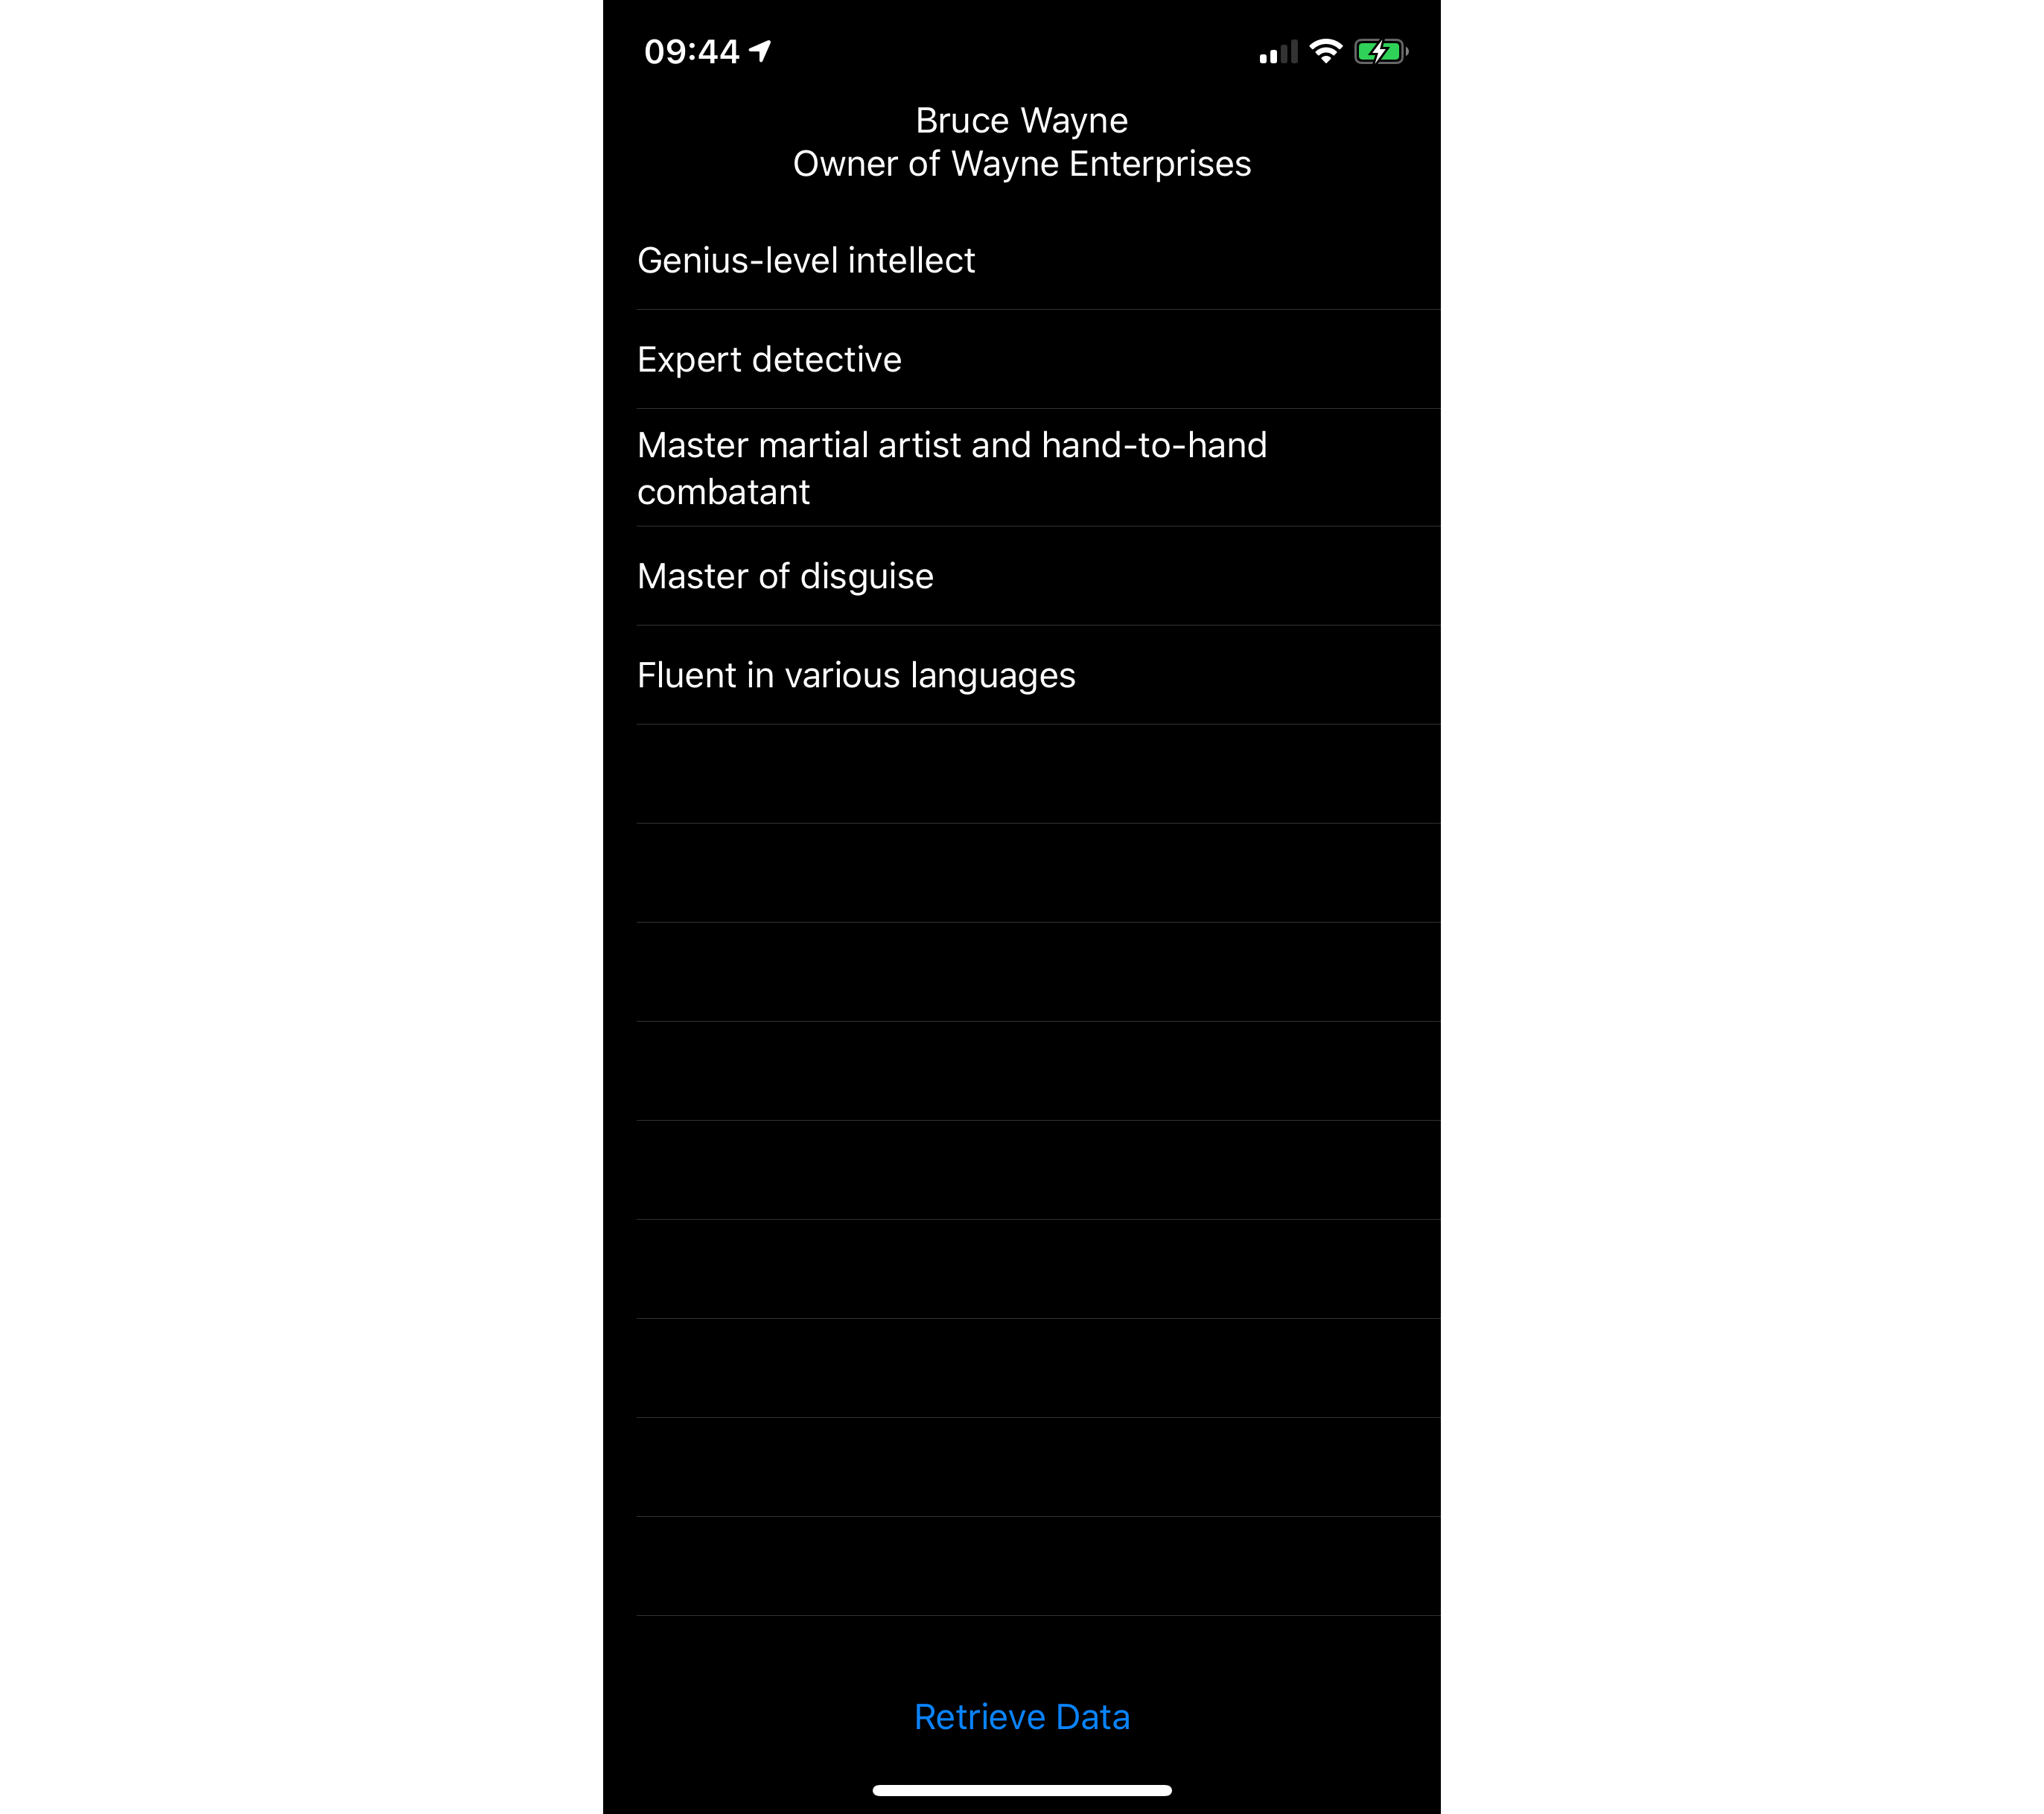
If your server is HTTP like mine, make sure to set your app to allow HTTP connections in info.plist.

That’s it for this post. Thanks for reading and I hope you find it useful. Again here are the links to the projects created in this post